Imagine your computer having its own little personal assistant, tirelessly keeping watch over its vital signs. Whether you're deep into an intense gaming session, rendering a complex video, or just relying on your machine for daily work, having a clear, real-time view of its performance isn't just for tech wizards—it's a smart way to ensure everything runs smoothly. Enter the dynamic duo of a Raspberry Pi, that versatile credit-card-sized computer, and MoBro, a clever piece of monitoring software. Together, they let you build a surprisingly affordable and highly efficient PC status monitor. This isn't just a gadget; it's a window into your computer's soul, letting you see the heartbeat of your CPU, the breath of your fans, and the flow of your network, all from a neat little screen.

Why Bother Building Your Own Monitor?
Let's be real, pre-built hardware monitors can be pricey and often lack the personal touch. Crafting your own with a Raspberry Pi is a game-changer. Here’s the lowdown on what it brings to the table:
-
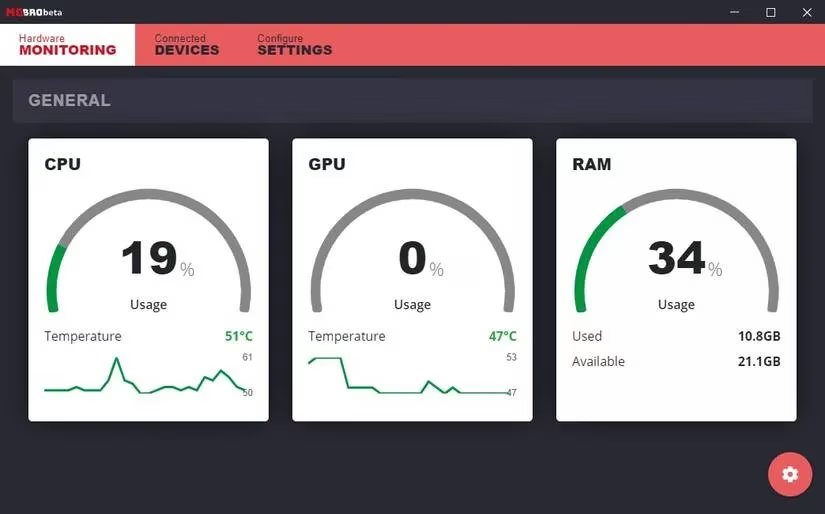
Performance Hawk-Eye: Tracks everything during heavy loads—CPU usage, temperatures, fan speeds, network activity. No more guessing!
-
Problem Detective: Helps you spot bottlenecks or weird issues before they turn into full-blown meltdowns.
-
Overheating Bodyguard: Keeps an eye on temps to prevent your precious components from cooking themselves.
-
Optimization Buddy: By understanding your system's behavior, you can tweak settings for peak performance.
-
Alert System: Get notified immediately if something goes sideways, so you can jump into action.
-
Energy Saver: Surprisingly, it sips power, making it an eco-friendly addition.
-
Ultimate Customization: This is the best part. You can tailor the look, data, and layout exactly how you like it. It's your monitor, your rules.
Gathering Your Toolkit
Alright, let's get our hands dirty. Here’s the shopping list for this 2026-ready project:
| Component | Details |
|---|---|
| Raspberry Pi | A Pi 3, 4, or Zero 2W will do the trick nicely. |
| LCD Screen | The official Pi display or any HDMI LCD (5 inches or larger is sweet). A 7-inch screen works great. |
| microSD Card | Class 10, 8GB or larger. This is the Pi's brain for this project. |
| Power Supply | A good quality supply for your specific Pi model. |
| Cables | HDMI cable, and maybe a micro-HDMI adapter if you're using a Pi 4 or Zero 2W. |
| Other | A PC with an SD card reader and a Wi-Fi network (a cable works too, but where's the fun in that?). |
Fun fact: With these same parts, you could later repurpose your Pi into a touchscreen control for a 3D printer or a retro gaming console. Talk about versatile!
Step-by-Step: From Box to Brilliant Monitor
Step 1: Prep Your PC with MoBro
First, we need to get the software side ready on your main computer.
-
Head to the MoBro website and grab two things: the Windows application and the special OS image for the Raspberry Pi.
-
Install the MoBro app on your Windows PC—it's as straightforward as any other software.
-
Fire it up! You'll be greeted with a dashboard showing your current system stats. It's alive!
Step 2: Flash the MoBro OS to Your Pi
Now, let's give the Raspberry Pi its purpose.
-
Extract the downloaded MoBro OS image file using a tool like 7zip.
-
Plug your microSD card into your PC.
-
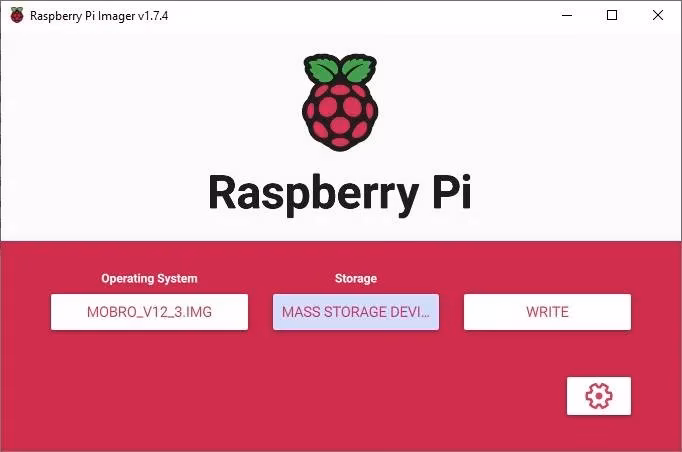
Download and open the Raspberry Pi Imager tool (it's still the go-to in 2026).
-
In the Imager, click Choose OS and select the extracted
.imgfile. -
Click Choose Storage and pick your microSD card.
-
Hit Write and let it do its magic.
Step 3: First Boot & Configuration
This is where the Pi wakes up and says hello.
-
Pop the microSD card into the Pi, connect the screen and power, and turn it on.
-
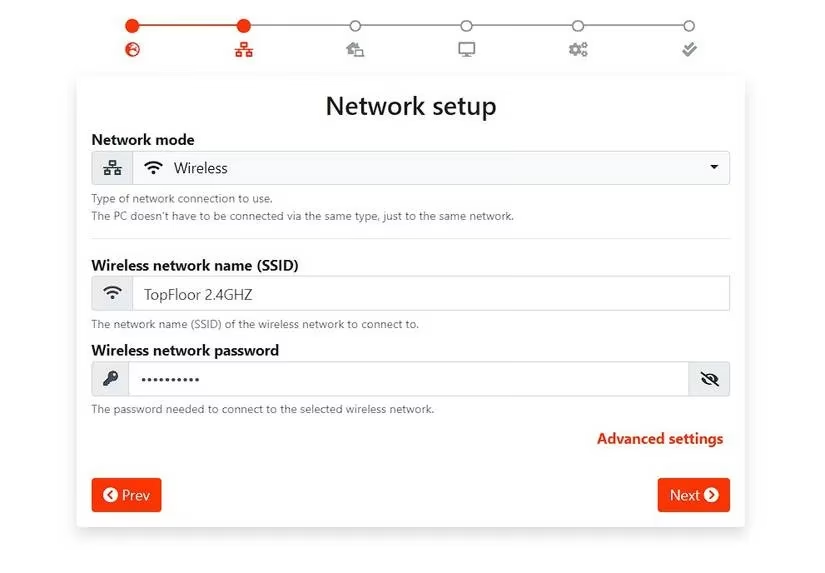
On first boot, after the MoBro splash screen, the Pi will create its own Wi-Fi network called "MoBro_Configuration".
-
Connect your phone or laptop to this network.
-
Open a web browser and go to
192.168.4.1. Boom—configuration page! -
A handy wizard will guide you through setting up your main Wi-Fi details, timezone, and giving your device a name. Piece of cake.

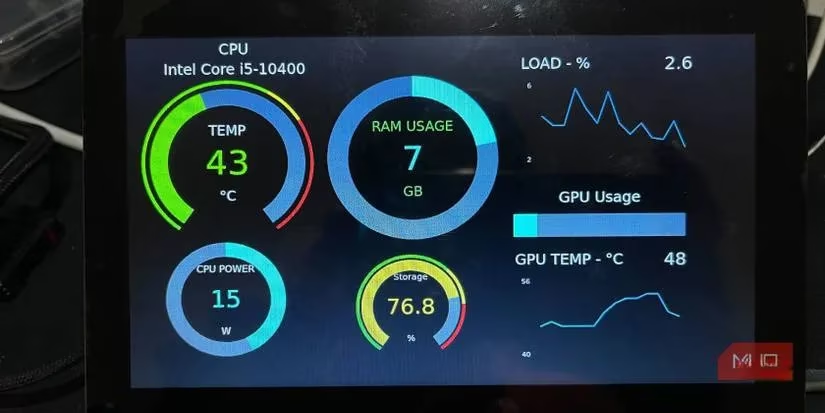
After a reboot, the Pi will join your home network and start hunting for the MoBro app on your PC. Since it's already running, they'll find each other and start chatting. Your PC's stats will now appear on the Pi's screen. How cool is that?
Making It Your Own: The Fun Part
Now for the creative bit—customizing your dashboard.
-
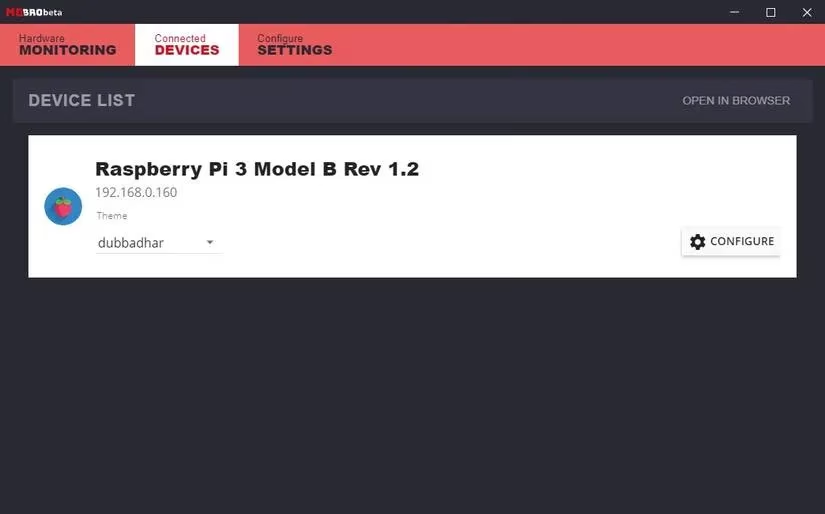
On your PC, open the MoBro app and go to the Connected Devices tab.
-
Here, you can play with themes, add new sensor widgets, and arrange everything just so.
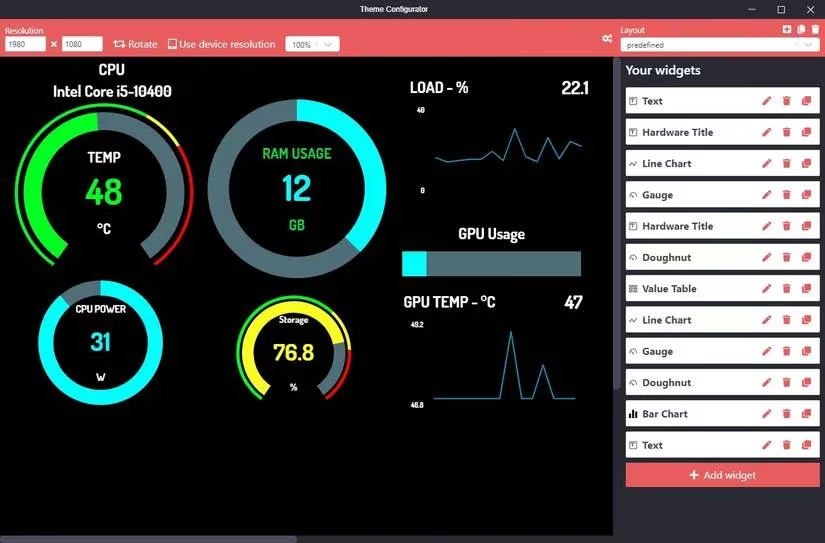
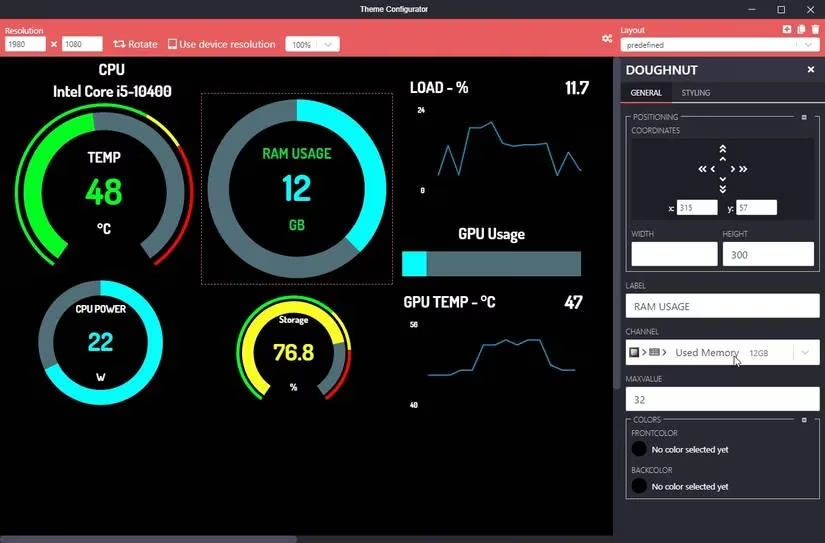
-
Click the edit icon on any widget. You can resize it, give it a label, and most importantly, choose which sensor data it displays.
-
Want more detailed sensor info? The default options are okay, but for the full monty, install HWiNFO or AIDA64 on your PC. MoBro can pull data from these for incredibly detailed readings.
Pro-Tips for a Killer Setup
-
Drag & Drop: Click, hold, and drag widgets anywhere on the layout. Changes show up on the Pi screen in real-time.
-
Style It Up: Don't like the font? Change it. Want a different color for your CPU gauge? Go for it. You can even rotate the display.
-
Community Themes: Feel like something's missing? Dive into the MoBro community and download custom themes made by other users, like the sleek "Astern" theme.
-
Location, Location: Mount the screen inside your PC case for a killer built-in look, or place it on your desk for a constant, cable-free overview.
And there you have it. You've just built a personalized, wireless command center for your PC. It’s a project that pays off by giving you peace of mind and a deeper connection to your machine. It’s not shouting for attention, just quietly doing its job... keeping your digital world in check. Who knew a little Pi could carry so much weight?